


Managing Your Digital Photographs
Paul Ellmore, webmaster
paul.e@laxtw.org
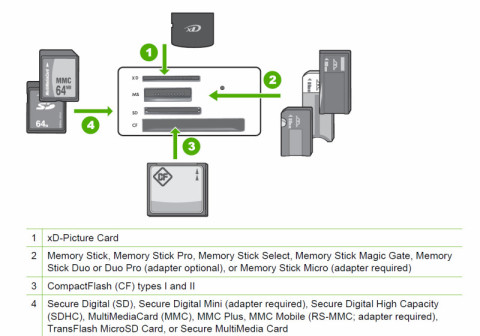
Inside your digital camera is a computer chip that is removable, and looks like one of the seven examples below.
Open the small door on your digital camera, and locate your photo chip. Push the small button to release it. Take this chip to your computer, your printer, or your computer's video screen. Hopefully you will find slots that are made for your camera's chip.
Digital cameras keep your photos using many "dots" which are called "pixels." Six million dots (6 mega-pixels) stuffed into a square inch of photo paper, produce a much sharper and clearer photograph than using just 2mp's. If you are purchasing a new camera, be sure it contains, at least, 6mp capabilities. There are cameras that go to 10mp and 16mp. Use 10mp if you want to blow-up your photo to poster size.
The more pixels that you set your camera to use, the more room it occupies on the above photo cards. Purchase large capacity cards, so that you will always have enough space for all your vacation photos.
You do not have to download to a computer to view or send your photos. You take this photo card directly to your photo shop or Costo Photo Center; or to a photo kiosk at Wallgreens or CVS Pharmacy (etc). From the kiosk, you view all your photos on a TV screen and select the ones you want printed ... and/or saved to a disk for mailing or keeping.
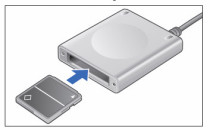
If your computer comes with an attached reader, insert disc until you hear a click. It will not go all the way in, so that you can pull it out, when done re-insert it back into your camera.
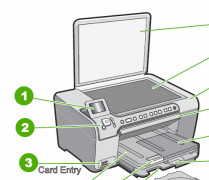
Your printer may contain slots. Insert until you hear a click. It will not go all the way in, so that you can pull it out, when done re-insert it back into your camera.
Some printers have a viewer (1) and arrows (2) so you can view what's on the disk, and directly print.
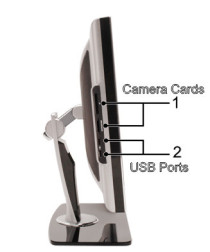
Some computer monitors have camera card slots. Insert until you hear a click. It will not go all the way in, so that you can pull it out, when done, and re-insert it back into your camera.
Some computer monitors have USB ports. These are used for connecting your camera directly by a cable, without removing any chips.
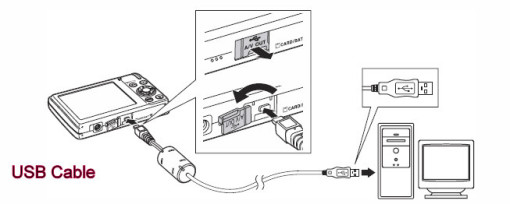
Your digital camera probably contains a mini-USB port, and with your USB cable, you can download photos to your computer by this cable, and not by removing your photo chip.
You can view your photos on your TV by using a Video cable connection from your camera; no computer needed, and no removing of the photo chip.
Connect your camera to your computer with USB cables.
Connect your camera to your television with Video cables.

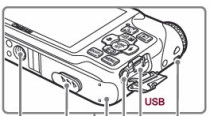
Open the door to your external connector ports.
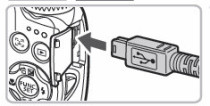
Insert the USB's mini-size end into your camera.
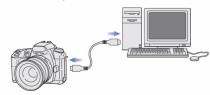
Insert the USB's full-size end into your computer, or computer screen.
The moment your computer sees something being attached, it automatically searches for a program to process the information that is on that newly attached item. Your default photo processing software should immediately appear on your screen, asking for permission to transfer the photos found.
Your camera should have been packaged with a computer CD containing a photo downloading and picture management software package.